January 12, 2015
By Mike Schoby
 While many of the skills Teddy Roosevelt used on his western adventures or Sir Samuel Baker employed exploring the Nile may transcend time, there is a whole host of modern skills that these two intrepid explorers could not fathom. Today there are airline policies to navigate, firearms rules and regulations to follow, and countless reams of red tape.
While "speaking softly and carrying a big stick" may work for Teddy, it's not likely going to work for you when confronted by a TSA agent. Instead buff up on these skills before you head afield for a much more pleasant and hassle-free adventure from start to finish.
Have Gun, Will Travel
It doesn't matter where your ultimate adventure takes you; Alaska, Africa, the American West or Canada, more often than not an airline is going to be part of your journey. It still amazes me that I can get almost anywhere in the world in a day, and most of the time my luggage arrives as well.
Advertisement
The complaints we have about minor delays, poor food, non-functioning entertainment centers, and the occasional lost bag would have made travelers of old keel over laughing. We are blessed to have modern air travel at our disposal. That being said, flights do not always go smoothly, and when traveling with firearms it can get even worse. Here are a few hard-won tips learned over millions of miles of travel.
The fact is, many airline personnel, as well as TSA agents, don't have a clue about the actual rules and regulations regarding traveling with firearms. Some claim you have to use TSA locks, while others say TSA locks are prohibited for gun cases. Some demand the bolt out of the gun (even though they are pointing at the magazine) or that ammo cannot be stored inside the case with the firearm. The bottom line is, they really don't know anything about firearms or the rules. They often make up policies on the spot.
To start, print off the airline's and TSA's firearms policies. Having these in your possession is the ultimate argument-ender. I have been given erroneous information many times from airline personnel. You can either argue with them or you can calmly ask for a supervisor and hand the supervisor their own printed web page — 99 percent of the time this ends the debate immediately.
Advertisement
 Aside from staying up to date on the current rules, here is generally how I prepare my firearms for travel. My method errs on the side of being cautious, and I voluntarily do things that are not required, but it avoids hassles.
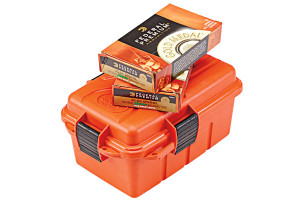
Take the bolt and obviously unloaded magazine (if possible) out of your gun and pack them in the case inside some protective padding — it's not required, but it stops ticketing agents from making a comment. Leave ammo in its original packaging. Put the boxes inside a small lockable hard case inside the gun case. I prefer the plastic MTM cases for this purpose and generally throw a tiny padlock on it.
Keeping ammo in a separate locked case gives you options. If an airline employee insists ammo has to be in a locked case separate from your other luggage, you can avoid the argument and simply comply. Remember this isn't about who is right or wrong, your goal is to get your guns and ammo to your hunting destination.
Even though the regulations say a gun case has to be "locked" TSA does not specify how many locks are required. I have been hassled by TSA demanding I lock every locking point on the case.
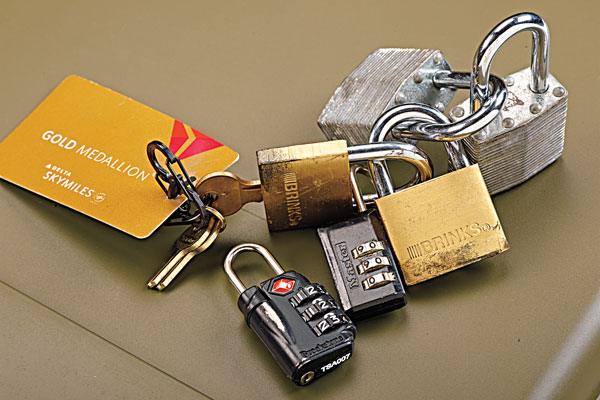
 Ridiculous, I know, but that's why they are stuck working for TSA and not going hunting (repeating that mantra helps keep your sanity). Most cases have two locking points. So bring two regular padlocks (I prefer combo locks as I hate losing keys and using bolt cutters to "unlock" my case). Like all hunters, set the combo at 2-2-3. It's easy to remember, and no hunter is going to break into you case and steal your gun.
I like to put four TSA locks and two more regular locks in my carry on. If they insist one type over the other, you have them at hand. If they break or cut your locks (which happens about 50 percent of the time) you already have a spare pair and can avoid searching for a Wal-Mart in Nome, Alaska.
I know all of this seems like a complicated hassle, and it can be. But I have never missed a flight because of firearms, and I have never had an airline lose one or damage one after literally hundreds of flights. And at the end of the day, I am willing to deal with a bit of red tape to get to Africa tomorrow instead of spending a month on a steamer ship like our early hunting brethren.
Firearm Permits Made Easy
One of the biggest mistakes American hunters make is not realizing that we are one of the few places in the world that does require a firearms license (thankfully). Most other countries do, and if you plan on visiting, you will need to get a visitors firearms license. In some cases this is as simple as filling out a form upon arrival (Canada), other times it is months of ridiculous paperwork completed in advance (England).
The bottom line is: If you want your trip to go as smoothly as possible, do everything you can well ahead of time. Start with booking your airline ticket through a sporting travel agent, not online or down at your local travel center. Generally, a dedicated sporting travel agent's ticket rates are similar to anyone else, plus they have the knowledge of what gun permits are required and often have a staff member that can help.
In addition, they are up to date on which airports you can't transit through if you have firearms and don't have the correct documentation. Heathrow, Amsterdam and Dubai currently come to mind. I use Gracy Travel and have had excellent experiences with their expert staff.
 Next, go down to your local Customs Office. You will need to get a Customs Form 4457 for your firearm. Essentially this form proves you had the firearm in your possession in the U.S. and you did not acquire it out of the country. It is the same form they use for anything of value; scopes, cameras, etc.
While by no means is this a firearms license, foreign countries commonly accept it as a license for their paperwork and having it will also make re-entry back in the U.S. easier.
"Sir, Is Your Suitcase Bleeding?"
Getting meat back can be difficult and costly when you travel far from home. If you go overseas, forget about it — USDA won't allow meat products brought into the country. Enjoy as much of that Kudu backstrap as you can in Africa and know the remainder fed a truly needy family. But if you travel to Canada, Alaska, or the American West, bringing the spoils back is not only possible, it is pretty easy.
Obviously if you drive, it is really simple. Bring a couple of large, quality coolers like Yeti or Pelican. Put the boned out meat in them and cover with ice. Even if it takes multiple days to get back, the meat comes out fantastic. If you fly, things get a bit more complicated. Essentially you have two options.
One: Take the meat to a butcher and have him cut, wrap, and freeze it. Once you are home, have him overnight it. This is the simplest way, but by far it is the most costly.
Two: Fly with a cooler or two as luggage. Put a soft duffle bag with your clothes inside one of the coolers. If you get game, bone it out, put it in the cooler, and then either check or ship your duffle bag home.
While policies change on traveling with ice, as of this writing up to 5.5 lbs. of dry ice can be in a cooler, but the cooler has to be marked and allowed to vent (leaving the drain plug open usually suffices). I don't normally care for dry ice as it is hard to find and it is so cold it will freezer-burn any meat it touches and will often freeze all the meat.
A better option is multiple frozen gel packs as long as the meat is cold to start with. Normal "wet" ice is not allowed as it can leak on other customer's bags making a mess.
As a side note: before you take your adventure of a lifetime sign up for the airlines' credit card. Usually this gives you an extra baggage allowance, both in weight and numbers of bags. This alone can save you several hundred dollars and you can always cancel the credit card after the trip.

